
Reviewed · WORKSHOPS
Hammer a Pattern on Your Ring Workshop
Your hammer makes a one-of-a-kind ring. In Nara, itoaware guides you as you use a hammer to texture your ring, then you leave with a wearable Nara souvenir plus staff photos for free.
I like how this is beginner friendly, with staff right beside you through each step, so you are not stuck figuring out tools and timing. I also like the option for inside engraving, from English letters and numbers to Japanese love characters. One thing to consider, though: this is ring texturing, not making a ring from scratch.
Key Highlights You’ll Care About
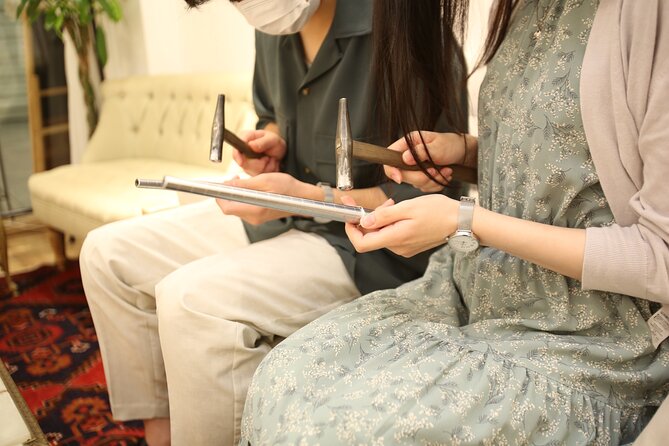
- Hammering your own pattern to create a texture no one else will have
- Choose the ring base options first (material, thickness, shape, and texture)
- Hand-polish finish done by the craftsman once your hammering is complete
- Optional inside engraving for rings from 1.5mm, with characters and symbols available
- Free photos taken during the workshop using the store camera
- Private experience setup for only your group
Hammer a Pattern on Your Ring Workshop in Nara, Japan
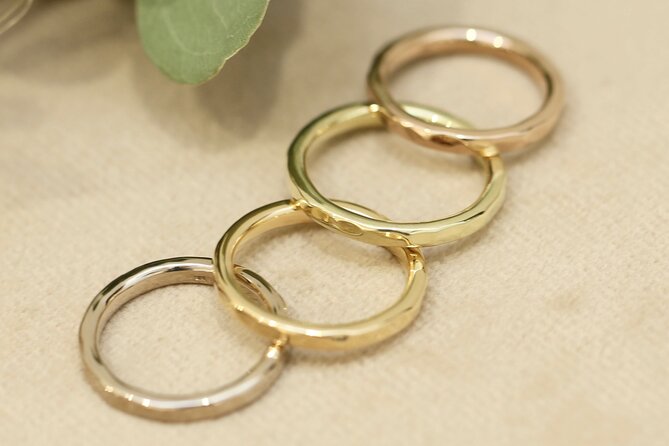
This is the kind of Nara activity that turns sightseeing into something you can actually wear later. You sit down, pick your ring look, and then you do the hands-on part: hammering a pattern onto your ring’s surface. It feels simple, but it ends with a finished piece that looks custom and personal, not like a mass-produced souvenir.
At itoaware-いとあはれ-奈良店, the staff stay close and guide you through each step. That matters, because the experience is designed for first-timers. You are not expected to know jewelry techniques ahead of time. You just show up, choose what you like, and follow along while the craftsman handles the parts you do not want to mess up.
Also, the workshop has a nice practical bonus: they take photos of your experience with the store camera and send you the data for free. So you get memories that match what you actually did, not just a few blurry shots in front of a shop sign.
More Kyoto temple visits, food tours, tea experiences, and day trips to compare


Where You Go and How to Plan Your Timing
The meeting point is itoaware Nara, 630-8222 Nara, Mochiidonochō 21番地 1F 南側. The workshop ends back at the same meeting point, so you are not bouncing around town with a tight schedule.
In real travel terms, that makes it easy to plug into a day in Nara. You can pair it with morning temple time or afternoon park time, then come back to the shop, finish, and walk out holding your ring. The workshop process takes about 60 to 90 minutes total, from choosing your design to getting the ring polished and ready to take home the same day.
A practical tip: give yourself a little extra buffer for getting there. Even though it is near public transportation, it is described as being in a shopping area that is a bit tucked away. In hot weather, you will be grateful it is indoors, with air conditioning noted by past participants.
If you hate waiting for reservations, plan ahead. The average booking window is about 31 days in advance, which suggests popular time slots fill up.
What Actually Happens: From Choosing Materials to Hammering Texture
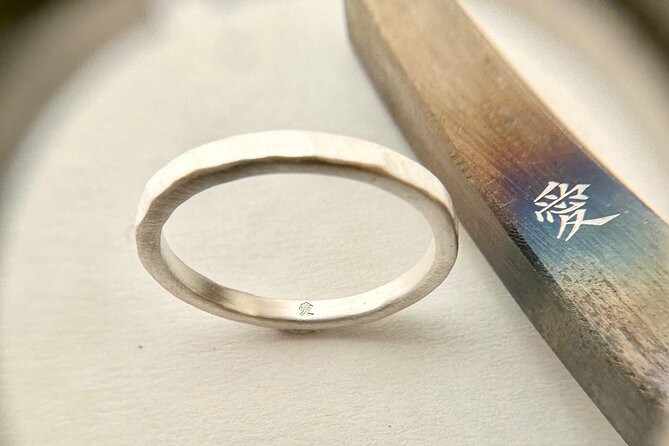
This is not ring-making from scratch. Instead, it follows a structured flow built around texturing.
Here is the typical rhythm, and it is useful because it tells you where your time and attention will go:
1) Choose your ring base look
You start by selecting the ring base details:
- Material
- Thickness
- Shape
- Texture
This is the part that sets expectations. You are not just choosing a design picture. You are choosing the physical characteristics that affect how the final ring will feel and how the pattern reads on the metal.
If you are deciding between different metals, remember that metal choice can drive the final price. One participant specifically pointed out that the metal can be costly, mentioning gold and platinum. So treat the $21.80 as the entry cost for the workshop experience, and expect that the final cost may change based on the material you pick.
2) The craftsman makes your ring based on your choices
After you choose, the craftsman prepares the ring based on your selection. Your role comes next.
This is a good setup if you want to be hands-on without worrying about the full technical process. You get the satisfaction of doing the tactile part, while the shop handles the precision steps.






3) You hammer the pattern
Now you do the core activity: hammering a pattern onto your ring. This is where the workshop earns its name. Your pattern is one of a kind in the world.
This step is often what makes people walk out smiling. It is physical, it is interactive, and you can immediately see how your effort changes the surface. And because the staff guide you, you do not have to guess force or placement. You can focus on making it look like you want, without turning it into a stressful tool lesson.
4) The craftsman polishes your ring
Once the hammering is done, the craftsman polishes the ring. That matters more than it sounds. Hammering can create sharp, uneven effects if left alone. Polishing is the step that makes the final result wearable, smooth, and clean-looking.
So think of it like this: you create the texture, and then the craft team refines it into a ring you will actually want to put on every day.
The Magic of the Hammer Moment (and How to Get a Result You’ll Love)
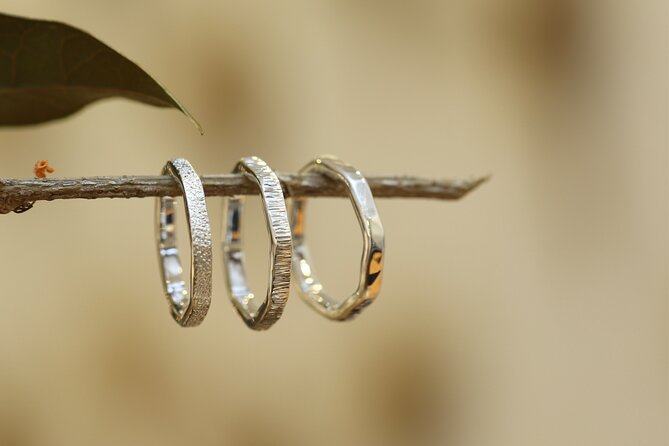
The hammering step is simple in concept, but you still want to approach it with the mindset of designing a surface.
A few practical thoughts that help you get a finish you will enjoy:
- If you like a subtler look, aim for a gentler, consistent approach when creating the pattern. Big variations can read as rough rather than artistic.
- If you want the texture to show clearly, you’ll want to pay attention to spacing and where you spend your hammering time.
- Do not rush the step. The fun comes from doing it carefully while someone is guiding you.
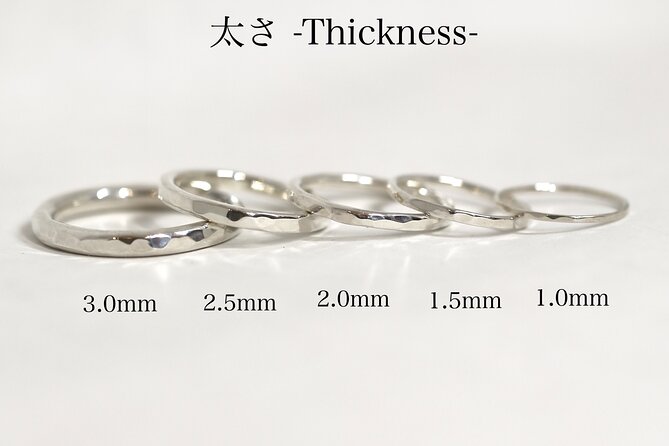
Also, because this is texturing rather than full ring construction, your final ring will reflect your original choices: thickness and shape affect how the hammered pattern looks from different angles. A thicker ring can make the texture feel bolder. A different shape can change how light hits the pattern.
This is why I think the choosing stage is worth taking slowly. You are not wasting time. You are setting up what you will see every time you look down at your hand.
Inside Engraving Options That Make It Personal
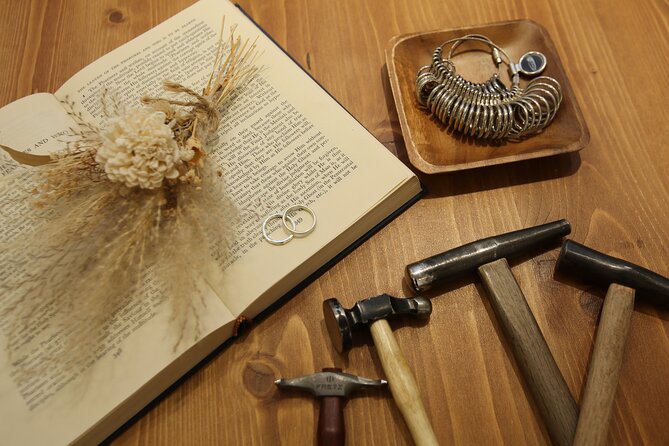
After hammering, you also have the chance to add hand engraving inside your ring. This is available for rings from 1.5mm, so it depends on the ring thickness you choose.
The character options listed include:
- English alphabet (A to Z)
- Numbers (0 to 9)
- Symbols such as &, 、 , ・ , and heart and star
- Japanese love, 愛 (with a note that love engraving is available starting from 2.0mm)
The best part here is that you get a hidden detail. Outside, your ring shows the hammered pattern. Inside, it can hold a message that feels private and meaningful.
If you are making a matching ring for a partner or a friend, inside engraving is an easy way to make the set feel intentional. If you are doing this as a family activity, kids and parents both tend to like personal marks because it turns the souvenir into something more than a one-time purchase.
The Free Photos: More Than a Nice Extra
One of the most praised parts of this workshop is the photo handling. The shop uses their own store camera, takes photos during the workshop, and sends you the data for free.
That is genuinely useful, because it solves a common travel problem: you want images of the action, but you rarely have someone who can photograph you while you are busy with tools. Getting the process captured also helps you later remember what you picked, how it looked while you were hammering, and what the final polished ring looked like.
Also, the staff interaction shows up in the photos. Several people highlighted how friendly the guides were. One guide name that came up is Masumi, who was described as guiding the process well and being very friendly.
Price and Value: What $21.80 Really Buys
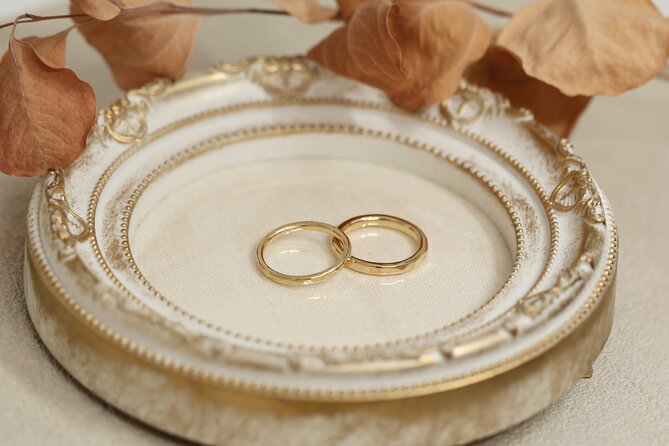
The listed price is $21.80 per person, and the workshop runs about one hour (with the full process described as roughly 60 to 90 minutes).
So, is it worth it? For me, the value case rests on three things:
- You leave with a real finished ring the same day. This is not a craft class where your work gets shipped later.
- You get a personalized element you do yourself. Hammer texture plus optional inside engraving means it does not feel generic.
- You get guided instruction plus free workshop photos. You are paying for a managed experience, not just access to tools.
The main caution is that metal choice can change what you spend. One review mentioned that the metal can be costly, especially for gold and platinum. The data you were given also shows that you choose material up front, so it is reasonable to expect options at different price points.
My advice: when you are budgeting, think of the $21.80 as the baseline for the workshop experience, then set aside extra for your preferred metal choice. If you are trying to keep this economical, consider asking what materials are available in different price levels when you arrive.
Who This Workshop Fits Best, and Who Might Want to Skip
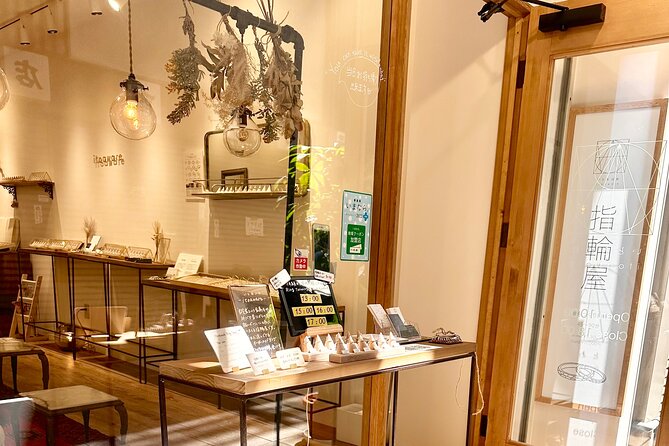
This is built for a wide range of travelers. The information says most travelers can participate, and it is described as easy for families, including children. One participant also enjoyed the workshop as a celebration trip with a friend.
You should strongly consider booking if you:
- Want a hands-on craft that turns into a wearable Nara souvenir
- Like activities with guided steps and reassurance for first-timers
- Are traveling as a couple or group and want a shared memory with matching details
You might want to think twice if:
- You want a workshop where you build a ring entirely from scratch. This one is about texturing and finishing, not full construction.
- You are very sensitive to cost differences based on metal choice. The price can rise depending on what you pick.
One more practical match: if you hate getting stuck in a busy crowd, the experience is private for your group. That typically makes it feel calmer and easier to ask questions.
A Simple Strategy for Ring Decisions
If you like to make decisions quickly, great. If you tend to overthink, slow down just a little at the beginning.
Here’s how I would approach it:
- Choose the thickness and shape that feel comfortable for long-term wear.
- Pick a texture that matches the style you usually wear: subtle and matte-like looks can feel more everyday, while bold hammered patterns can feel more statement.
- If you are adding inside engraving, decide what you want to hide in the ring first, then let the required ring thickness guide you. Since love engraving is tied to 2.0mm and engraving is available from 1.5mm, your message can influence your ring plan.
And if you are making matching rings, decide together. People often enjoy making matching rings because the shared steps become part of the story.
Should You Book Hammer a Pattern on Your Ring Workshop?
If you want a unique Nara souvenir that you actually wear, I would book this. It has the right mix: hands-on hammering, a guided process, optional personal engraving, and same-day results. Add the free photos, and you get a memory package that is usually hard to create on your own while sightseeing.
The only reasons to skip are pretty clear: if you expected full ring-making from raw materials, or if you are not comfortable with the idea that the metal choice could affect the total cost. If you can handle those two points, this is a friendly, practical way to take a piece of Nara with you.
FAQ
Where is the workshop located?
The meeting point is itoaware Nara, 630-8222 Nara, Mochiidonochō, 21番地 1F 南側.
How long does the ring texturing workshop take?
The process takes about 60 to 90 minutes, and the tour duration is listed as approximately 1 hour.
Do you make the ring from scratch?
No. This workshop is ring texturing, so it is not ring-making from scratch. A craftsman makes the ring based on your choices, and you hammer the pattern.
Can I add engraving inside the ring?
Yes. Inside engraving is available by hand for rings from 1.5mm. Options include English letters (A to Z), numbers (0-9), and symbols such as &, 、 , ・, heart (♡), and star (★). Japanese love (愛) is listed for 2.0mm and up.
Do you get photos from the workshop?
Yes. The staff take photos of your experience with the store camera, and the photo data is provided for free.
Is this a private experience?
Yes. It is a private tour or activity, so only your group participates.
Is free cancellation available?
Yes. You can cancel up to 24 hours in advance for a full refund.
More Workshops & Classes in Nara


More Tour Reviews in Nara

Not for you? Here's more nearby things to do in Nara we have reviewed








Workshops, compared.
 ★ 4.345-Minute Tea Ceremony Lesson ExperienceFrom $222,378 reviews
 ★ 5.0Ramen Cooking Class at Ramen Factory in KyotoFrom $1311,937 reviews
 ★ 5.0Chopsticks Making Workshop in Gion with Engraving OptionFrom $15958 reviews
 ★ 4.9Samurai Sword Class by Experts in Traditional ArtsFrom $64657 reviews
 ★ 4.9Ramen Cooking Class at a Ramen Factory with SouvenirFrom $127532 reviews
 ★ 5.0Ninja 1-hour Hands-on Lesson by Japanese master in Kyoto -EntryFrom $80489 reviews
 ★ 5.0Ramen, Gyoza, and Onigiri Cooking ClassFrom $90445 reviews
 ★ 5.0The Original Small-Group Sushi Making Class in KyotoFrom $69436 reviews
Browse the lists this tour appears in